How to setup LMS in DietPi
Pre-requisite
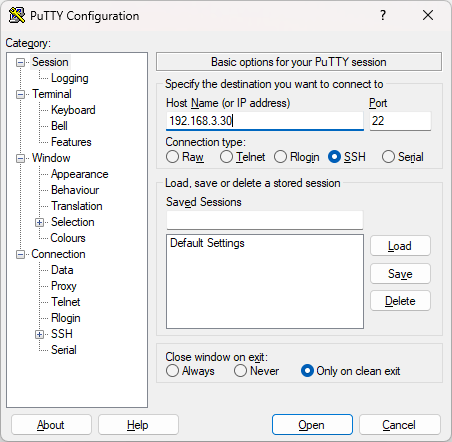
1. Download install Putty
2. Find the IP of your DietPi device with Fing (Android) or Advanced IP Scanner (Windows)
Mount NAS
1. Log in DietPi with user=root and password=dietpi
2. Type dietpi-config and enter the setup menu below:
3. Select “Network Options: Misc” and click Enter:
4. Select “Network Drives” and click Enter
5. Select “Add network drive”
6. Select the SMB or NFS protocol:
7. Enter the IP of your network drive:
8. Enter the share drive details:
9. Enter username and password:
10. Input a name of your network drive. After you click OK and wait for a while, you will get the following message. Click OK to exit the setup.
11. Make sure you have your SMB server setup correctly. If the above steps do not work, it is probably you have an incorrect username or password, or the SMB permissions are not correct.
Mount an external SSD/HDD
1. Log in DietPi with user=root and password=dietpi
2. Type dietpi-drive_manager and enter the setup menu below:
3. You should be able to see the attached USB drives in the menu above. Click this device and select “Mount”:
4. Give it a meaningful name and click Enter:
5. Now it should be mounted:
Audio Output
1. Log in DietPi with user=root and password=dietpi
2. Type dietpi-config and select Audio Options
3. Under the Sound Card setting, DietPi should show you the installed DAC HAT. Or you can choose the output as USB DAC:
4. If you are using the Allo Boss DAC 2, you need to increase the analogue output as the default output is too low. Select “DietPi-JustBoom”, and then “ALSA Mixer”:
5. Turn up and volumes as follows:
Check Squeezelite status (optional)
1. Log in DietPi with user=root and password=dietpi
2. Type dietpi-services and enter the setup menu below:
3. If the output device is setup correctly, you should see squeezelite is active as shown above.
Setup music source in LMS
1. Now switch to a browser on your PC. Go to (IP address of your DietPi device):9000. Click the 3 dots on the right-hand corner.
2. Select Settings > Server, scroll down and find the Media Folder, enter the path of your media files:
3. Under the “Rescan Media Library”, Select “Clear library and rescan everything”, and click “Rescan” button next to it. Save settings and exit. Now you should be see all of your music files and scanning is completed.


Comments
Post a Comment