Posts

Controlling DietPi with SSH Shortcut
Image
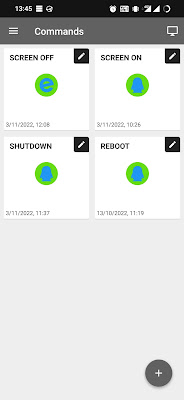
Although DietPi works great as an audiophile OS, unlike other headless OS, it does not know when to turn off the screen when audio playback is stopped. In this sens you will need to turn ON/OFF the screen manually with SSH shortcuts. Having tested several SSH shortcuts apps in Android, this one works like a charm. Firstly, add a new SSH server with a label (e.g. STEALTH), login and password. Leave the port unchanged. Add the following commands if needed: SCREEN OFF export DISPLAY=:0 && xset s 5 TIP: You can replace "5" in the above script with whatever timeout you want. SCREEN ON export DISPLAY=:0 && xset s default && xset s reset SHUTDOWN sudo shutdown NOTE: Shutdown occurs after 1 min. REBOOT sudo reboot ...

Installing LMS and Squeezelite on DietPi (Raspberry Pi Streamer / Player Tutorial)

Image
When playing with Raspberry Pi streamer with a wide screen, usually Volumio is the only option as Picoreplayer does not support it while Moode Audio UI does not fit it well. However although Volumio works fine with wide screen but some people still prefer LMS or MPD. In this article I will walk through the steps to install a LMS + Squeezelite with DietPi DietPi is a lightweight OS based on Debian, while providing lots of nice features. For more details, please visit https://dietpi.com/ . 1. Install DietPi Download the image and flash it on the micro SD card, balenaEtcher is recommended. 2. Modify config.txt Depending on the widescreen touchscreen you use, append the following to config.txt under root of the SD card: hdmi_group=2 hdmi_mode=87 hdmi_timings=400 0 100 10 140 1280 10 20 20 2 0 0 0 60 0 43000000 3 hdmi_blanking=1 max_usb_current=1 ...

LAWO 7550 Pre-amp

Image
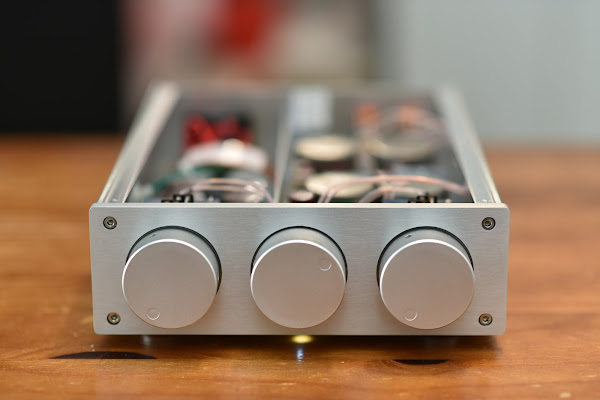
The is a simple project which was made for a friend of mine. Not much technical information in the post, though a custom-made LPS was developed to fit into the case and the LAWO board. The LAWO board was purchased online and provided by my friend. In the middle of the pre-amp it is the power switch. In an attempt to deliver a minimal style, the power indicator (white in color) was not shown in the front panel. Instead, it points towards the desktop so a light at the desktop appears when the device is turned ON. On both sides of the pre-amp they are the individual left and right channels respectively. These high-precision volume attenuators are also provided by my friend, my job was to measure the dimensions and design the appropiate case to accomoodate them. Again, there is not much technical technical skill required. The sound coming out from this pre-amp is "pu...

DIY 300B Monoblock

Image
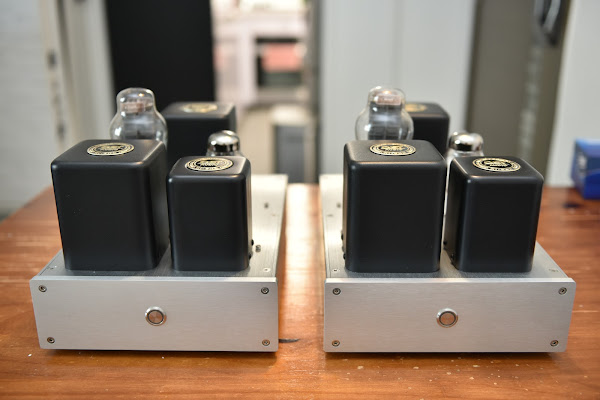
I have been working on several EL84 tube amps - stereo, dual mono and mono. All of them sound great, but the problem is that each channel can only output 1.4W max, which is good enough for close listening in a small space. As for the next project, I decided to build a pair of monoblocks which can output larger power. Why monoblocks? Because monoblocks can deliver the clearest sounds without affecting the other channel (crosstalk). And it's relatively easier to build a pair of monoblock VS a dual mono. So now it comes to the selection of tubes. I like listening to vocals, people are saying both 2A3 and 300B are very suitable for vocal and both tubes are quite similar. However 300B can deliver larger power, so I decided to go for 300B. Design Rationale I like simple and clean things, and cannot withstand wires flying from one end to another like a spider web, ...

How to turn your piCoreplayer into a CD Player

Image
piCoreplayer can be very handy when playing music stored in the NAS or HDD, but what if you want to play a CD one day? Would you invest another CD player if you just want to play a CD occationally? This article will walk you through the steps how to make a cheap but nice CD player with your existing devices. Materials -a piCoreplayer -an external USB CDROM -patience Step 1 - Connect USB CDROM to piCoreplayer Connect the external USB CDROM to the USB port of your piCoreplayer first, either the 2.0 or 3.0 port will do. If you do not have one, you can buy one from computer centers, it costs around USD30. Step 2 - Install extension in piCoreplayer By default, piCoreplay does not suppor...

DIY Raspberry Pi 4 piCorePlayer Part III - Software

Image
Software Finally it comes to the software session after a complete assembly. After trying several headless software, namely Volumio, Moode Audio, Hifiberry OS and Picoreplayer, I decided to go to Picoreplayer. This is not only because of the outstanding sound quality, but also a very user-friend interface (touchscreen) and numerous plugins available. Boot up sequence - Personally I like it quite much, it looks pretty cool on a 5" touchscreen :P Setting up Picoreplayer This guideline will walk you through the settings of Picoreplayer. The set up was based on Picoreplayer 7.0.0 but it would be pretty much the same for the latest version 8.0.0. I am not going to teach you how to flash the image to the SD card as there are lots of tutorials available. You may download the latest version 8.0.0 from Picoreplayer website: https://docs.p...